Friday, July 27, 2012

DIY Hime Gyaru Lace/Ribbon Chokers

I like this picture ^^

Ohh tumblr, how I love thee :p
I always see such pretty things on tumblr, and I cant help but be inspired!

A few days ago I came across this post:
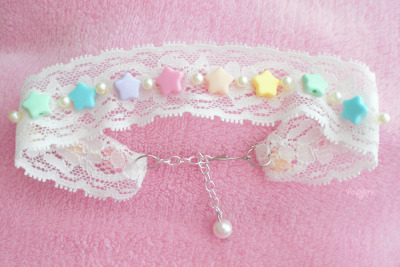
Original post here
It looks sooo simple, yet very cute!
Honestly, I can't believe that I hadn't thought of it before~
It just seems like a no-brainer!
The original photo is obviously fairy kei inspired, but mine will be hime gyaru inspired. It's just a matter of convenience, since most of my supplies are more applicable to hime styles~
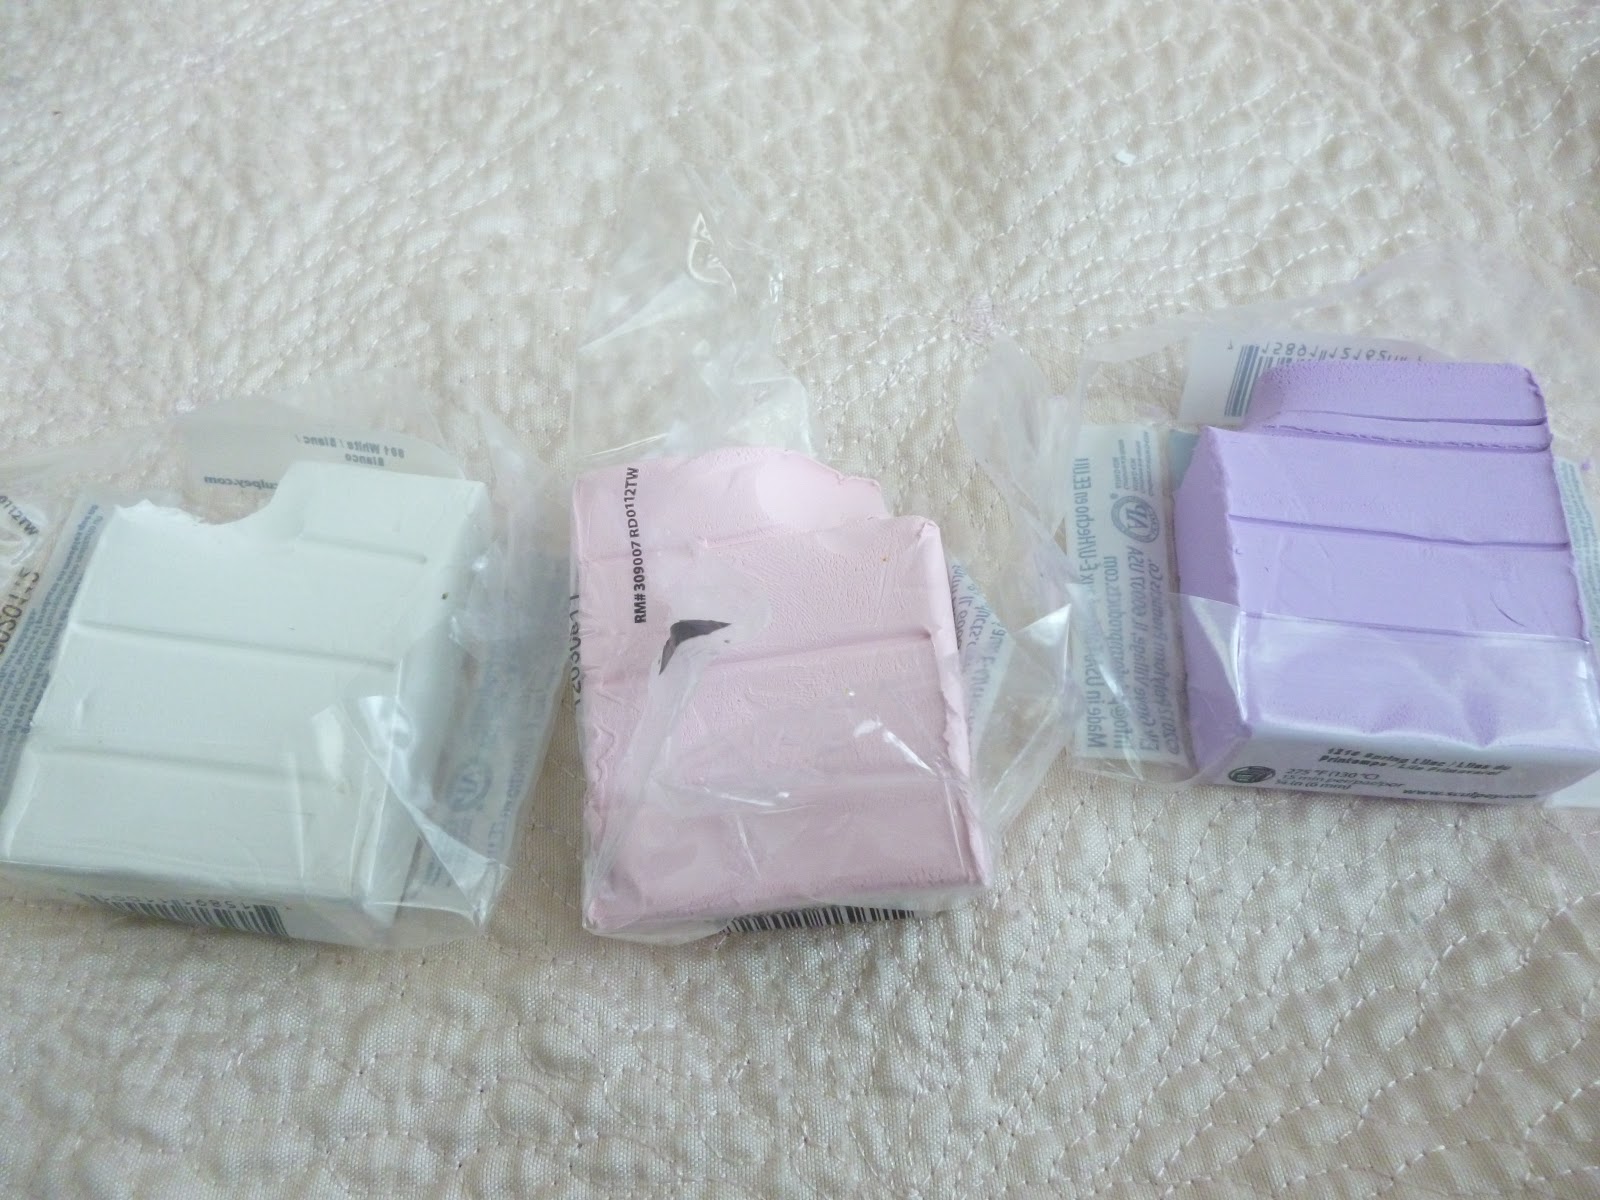


You will need:
  • Flat lace ribbon (or any kind of ribbon, for that matter)
  • Jewelry jump rings
  • Jewelry closure/ clasp
  • Jewelry chain
  • Misc decorations

Retrieve a clasp and jump ring.

Loop the clasp through the jump ring.


Since the ribbon I'm using has loops, I looped the clasp through one of the pre-made holes >< If you're using lace, it's pretty much the same deal~


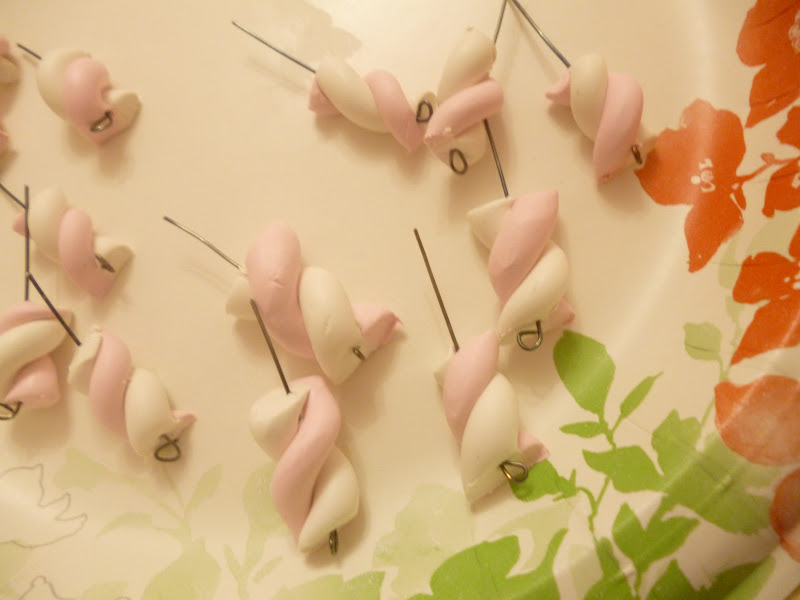
Retrieve a jump ring and a segment of jewelry chain.


Attach the chain in the same way that we attached the clasp~


Add pretty decorations ^^ I don't know what to say besides this x)


So.... yup ^^
 That was a super easy tutorial! Even so, I really like my results. I've worn both a few times, and nothing bad has happened to either of them. I hope you enjoy yours as well :)


OH, and thanks so much to everyone that participated in my poll! However, I wasn't sure how to go about giving tips since my room is already decorated >_>

So instead, I just made a quick tumblog of pretty rooms that I suppose you guys can use for inspiration xD. I figured that tumblr would be the best platform for this kind of thing because I can keep everything in one place ^^ I'll probably make a tab on my blog full of the same pictures for ease of access eventually...but tumblr is just so quick and easy x)


There are so many good ideas! I didn't actually look for inspiration before doing my room, but I certainly wish I had T_T

So, here's the link ^^ http://lovelycandyhome.tumblr.com/

One more thing:
My next tutorial is going to be extremely awesomely awesome. It's more of a fairy kei tutorial, but it's probably one of my favorites. I was debating whether or not I should release this post or that one this week, and I ended up releasing this one. I also have one about hime-fying your school stuff, but I have quite a bit of time to put that one out :)

Friday, July 13, 2012

DIY Candy Jewelry Tutorial


In my last post, I shared a photo of some "candy" jewelry pieces that I had recently made. Candy themed jewelry seems to be popular among people that subscribe to the fairy kei or pastel goth styles, both of which I find very pretty :) This is two tutorials in one, so just bear with me on the length x)

Okay!


Tutorial #1: Lollipop Charms

You will need:
  • Oven bake colored clay
  • Eye pins
  • "Lollipop sticks"


Separate 3 similarly sized lumps of clay.


Roll out each lump separately into a cylindrical form and lay them side by side.


Ummm...do this ^
I'm not sure how to explain this step, but I don't believe that it really needs an explanation, right?


Roll out the attached pieces of clay to your desired thickness.


Carefully twist the formation until it appears similar to the above image.


I apologize for the gross yellow lighting =/ I moved to the kitchen in order to make use of the granite countertops. Choose one end of your clay formation as the center. Fold over the very tip~


Roll the twisted formation into a circular pattern. Insert an eye pin through the side of your lollipop. This will be the top of your lollipop. Insert your "lollipop stem" through the opposite side of the lollipop.

Skip to the end to learn about "baking" the jewelry pieces. No, I didn't necessarily think this out very well as I took photos.

Tutorial #2: Marshmallow Pole Charms

You will need:
  • Oven bake clay
  • Eye pins
  • an ID card or credit card


Separate two similarly sized lumps of clay.


Roll them into a cylindrical shape.


Twist the cylinders together until it looks like this ^.

Comparing my clay marshmallow pole to a real marshmallow pole.


Using an ID card, slice through the clay pole.


Insert an eye pin through the center of your charm~


Repeat this for each of the clay pieces.


Tutorial #3: Baking the pieces


Cover a baking sheet with aluminum foil.
Arrange each piece on the foil so that none of them are touching.

Bake according to the instructions on your clay.


After your pieces have been baked, you are free to decorate them in whichever way that you'd like.

To use your lollipop charms on a necklace, just attach a small jump ring and slip it onto a chain ^^. I feel think this tutorial may have seemed confusing, but it's actually verrry simple once you begin! Have fun everyone!


Saturday, July 7, 2012

My New Bow "Collection," My Room, +Some Other Things

Hey everyone! ^^

I recently cleaned my room and thought "Hey, I should take some pictures." However, after reviewing the pictures below, I've come to the conclusion that I should have done a bit better despite the pride that I felt after the conclusion of my "cleaning session."
Even so , I thought I'd share these pictures. Please excuse the mess.

You can see my puppy as well as some dog toys haphazardly thrown about the floor :p.
In this picture, you can see a glass case on my nightstand in front of my window. This, my friends, is my new bow case (pictured below).
I was given the opportunity to design my room (pretty much) from scratch, so ofc I leapt into action xD. I picked out most of my furniture from the antique store, and my chandelier was purchased from a hardware store. I'd always kind of liked the look of bamboo flooring, so I had it installed in my room ^^


 The other day, I spent an entire evening making bows, because I felt that my "collection" needed some variety ><. I've decided on displaying them in this glass case, and I rather like how it turned out :). I arranged most of my accessories based on their color. I made all of the bows pictured, but purchased most of the small clips ^^.

As I was making them, I realized that offering a bunch of bows and such for a giveaway could be pretty fun :). I think I'll start "stocking up" and making a bunch of things for a giveaway that I can have next year. Why next year? I just think that it will be more acceptable for me to be 18.

Candy jewelry pieces made by me :)
This is a picture of my next tutorial~ Have you guys seen candy themed jewelry pieces around? I think they're super cute, so I made some xD

Please make some requests! Tweet or email me a picture of something you've seen, and I'll see what I can do about replicating it ^^ (see the contact page).
Related Posts Plugin for WordPress, Blogger...