Saturday, November 16, 2013

DIY Tutorial: How to Kawaii-ify Your Winter Boots (Super Sweet ❤)

Hey guys 

It's getting colder outside, which means that most of you are either:


  1. Surrendering your impeccable fashion sense to Uggs in exchange for warmth
  1. Surrendering your last four paychecks to import footwear that is both cute and warm


Luckily for you, I'm here to let you know that there is in fact a third option >:)

On to the tutorial  o(^^o) (o^^)o


For this tutorial, you will need:
  • Fabric Paint
  • Fabric Glue
  • Craft Fur (I used two pre-packaged pieces of fur, but I'd recommend visiting a fabric store)
  • Two decorative centerpieces, such as bows or flowers


Start with a pair of boots no longer worthy of seeing the outdoors. This is what mine looked like after being washed, so it's safe to say that it was time for them to retire.


Using fabric paint, paint them in a shade of your choosing. If you make a mistake, use a wet q-tip or sponge to clean up the area.


Depending on the dimensions of your craft fur, this step may or may not be necessary. Fold fur in half.


Cut down the center. This was only necessary because my fur wasn't quite long enough to cover the circumference of my boots~


Using fabric glue, secure fur to the boot.


If you're left with a gap, cut a piece of craft fur equal to the length of the exposed area.


Use fabric glue to secure the smaller piece of fur. To ensure that the pieces blend seamlessly, make sure that the hair of each piece points in the same direction.


Repeat for your second shoe.


Time for bows! Use fabric glue to secure bows to craft fur.
Dry overnight.


 Enjoy *^^*


Saturday, September 21, 2013

My Hime Inspired Eyeglass Case❤

Hey guys!

I've had this post in the making for several weeks now. I'm so sorry for putting it off X_x
I've been having so much fun in school!

Before I left for school, I wanted to ensure that I carried my eyeglasses with style, so I decorated it ^^. If you'd like to see how, please stay tuned for the tutorial.


Start with a plain eyeglass case. 


Gather any/all paints, decorations, and embellishments necessary to achieve your desired look. I ultimately used spray paint, glitter, lace, glitter ribbon, a large fabric flower, and heart shaped rhinestone stickers.


Using craft spray paint, apply a thin coat of paint to your eyeglass case. Apply as many coats as necessary.


While wet with final coat of paint, sprinkle eyeglass case with craft glitter.


Once dry, retrieve lace trim of you choosing.


Using hot glue and/or E6000, secure trim around case edges


Add accent ribbon.


Decorate with small gems and floral centerpiece.


Secure a small bow atop case closure.


Voila! Now you have an eyeglass case that requires another case to avoid damage of our decorations x)


Or if you're like me, you can just chuck in a drawer and forget about it because you find glasses to be a hassle >< (so much for carrying glasses in style -.-)

Ta ta for now my lovelies ^^~

Saturday, April 27, 2013

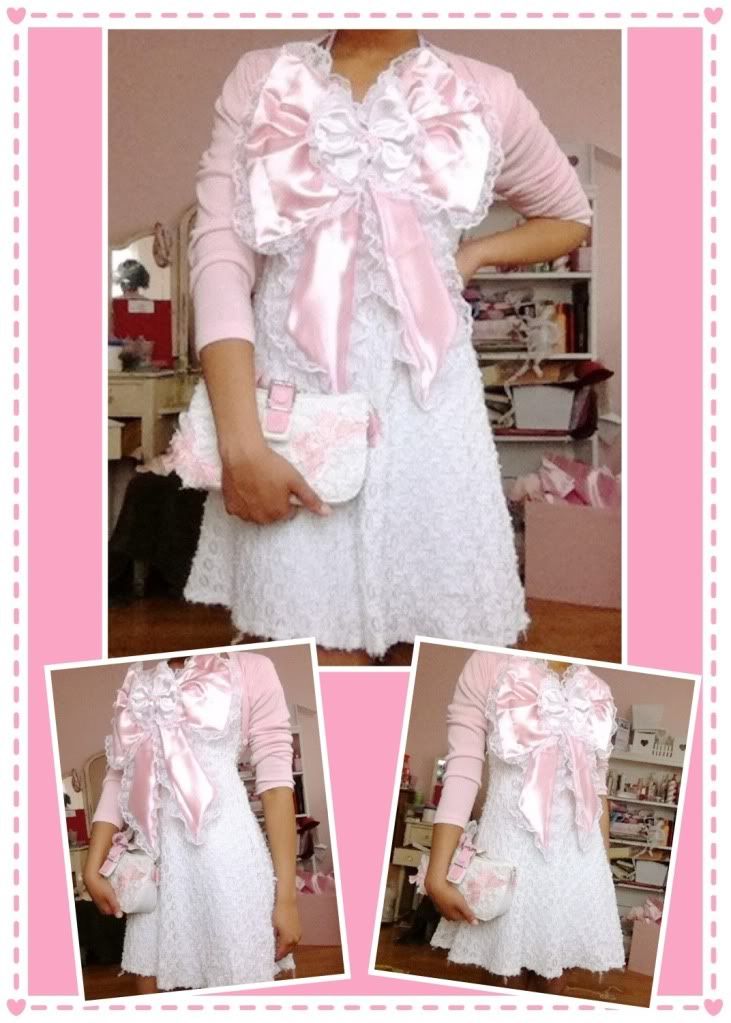
Tutorial GIGANTIC Bow Necklace (Hime-fy any outfit!)


Hey guys!

I've wanted to make this tutorial for a long time, but I hadn't had the motivation necessary to DIY anything T_T. Today, however, I was feeling especially guilty about my long hiatus and lack of tutorials, so I figured I owed it to you guys to make this :)

Those of you who pay lots of attention to hime clothing may have taken notice of the gigantic bows present on the chest of almost every dress out there. 

Exhibit A
As someone who wears mainstream clothing in public, owning such an OTT and elaborate dress would be hard to justify (considering that I only put on my "pretty things" to stare at myself in the mirror for a little while before taking off xD).

I figured that I'd be better off just making removable bows that I can wear over normal clothing and pretend that I'm wearing authentic hime gyaru clothing brands. If you're interested in finding out how I made mine, look on!


This starts off rather simply. Just like when we make little bows, we'll need a piece of fabric that is double the size that we'd like our eventual bow. In this case, that means super extra gigantically huge ^^.


Fold over the raw edges and secure with hot glue.


Fold ends towards the center and secure with hot glue.


Use a teensy ribbon to cinch the center of the rectangle, creating a bow. 


Cut a strip of fabric double the width that you'd like your eventual bow tails to be, fold in half, and cut one of the ends at an angle. Repeat for second tail.


Add a centerpiece bow to the middle of your large original bow and play with the positioning of your bow tails. After you're happy with them, secure with hot glue or fabric glue.


Line edges with lace trim.


Attach two strips of fabric (securing left and right sides only) to the back of your bow.
Lastly, loop bead string through fabric strips.


You're done!


Hopefully you guys enjoyed this tutorial ^^

Related Posts Plugin for WordPress, Blogger...